
🔧 Troubleshooting Injection Molding #18 – Cold Slug
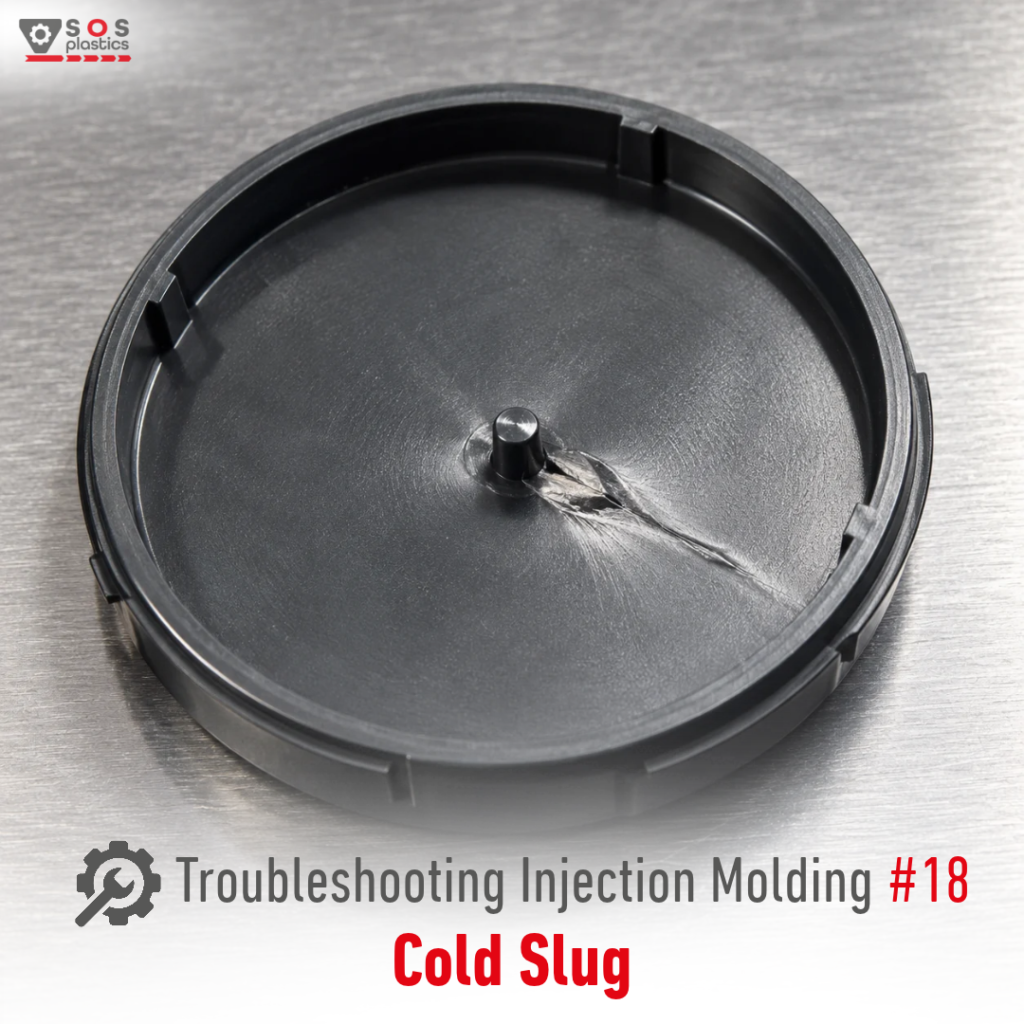
A cold slug is a piece of polymer that solidifies in the nozzle or runner and is carried into the mold cavity with the next shot. When troubleshooting Cold Slug, investigate the causes in the right order: 1️⃣ The material freezes in the nozzle➡️ Verify the actual nozzle temperature, heater performance and thermocouple condition. Increase nozzle temperature within the material supplier’s recommended window if required. 2️⃣ The cold slug pocket is missing or incorrectly located➡️ Check the sprue and runner design. A cold slug well should catch the initial cold material before it reaches the gate. Add or reposition the pocket if required. 3️⃣ Melt leakage during mold opening or closing➡️ Check nozzle contact, decompression and the timing of injection unit retraction. Reduce the risk of melt entering the mold before the next shot. 4️⃣ The nozzle or runner geometry promotes cooling➡️ Verify nozzle aperture, runner dimensions and thermal separation. Long or narrow flow paths and inadequate heating can increase the risk of premature solidification. 5️⃣ The cold slug enters the cavity and disrupts the flow➡️ Inspect the gate and filling pattern. If the cold material blocks or divides the flow, it can create a weld line or even prevent complete filling. Correct the upstream cause and review the runner design. ⚠️ A cold slug is not necessarily a material problem. It can originate from nozzle temperature, mold design or the injection unit’s movement. ⚠️ Increasing the nozzle temperature is not always the best solution. Heat-sensitive polymers may degrade if overheated. ⚠️ The cold slug well is a preventive design feature, not a substitute for correct temperature control. Next in the Plastic Troubleshooting Series:➡️ Ejector Pin Marks Have you ever solved a recurring Cold Slug problem by changing the nozzle temperature, or was the real cause hidden in the mold design?
🔧 Troubleshooting Injection Molding #17 – Orange Peel Effect
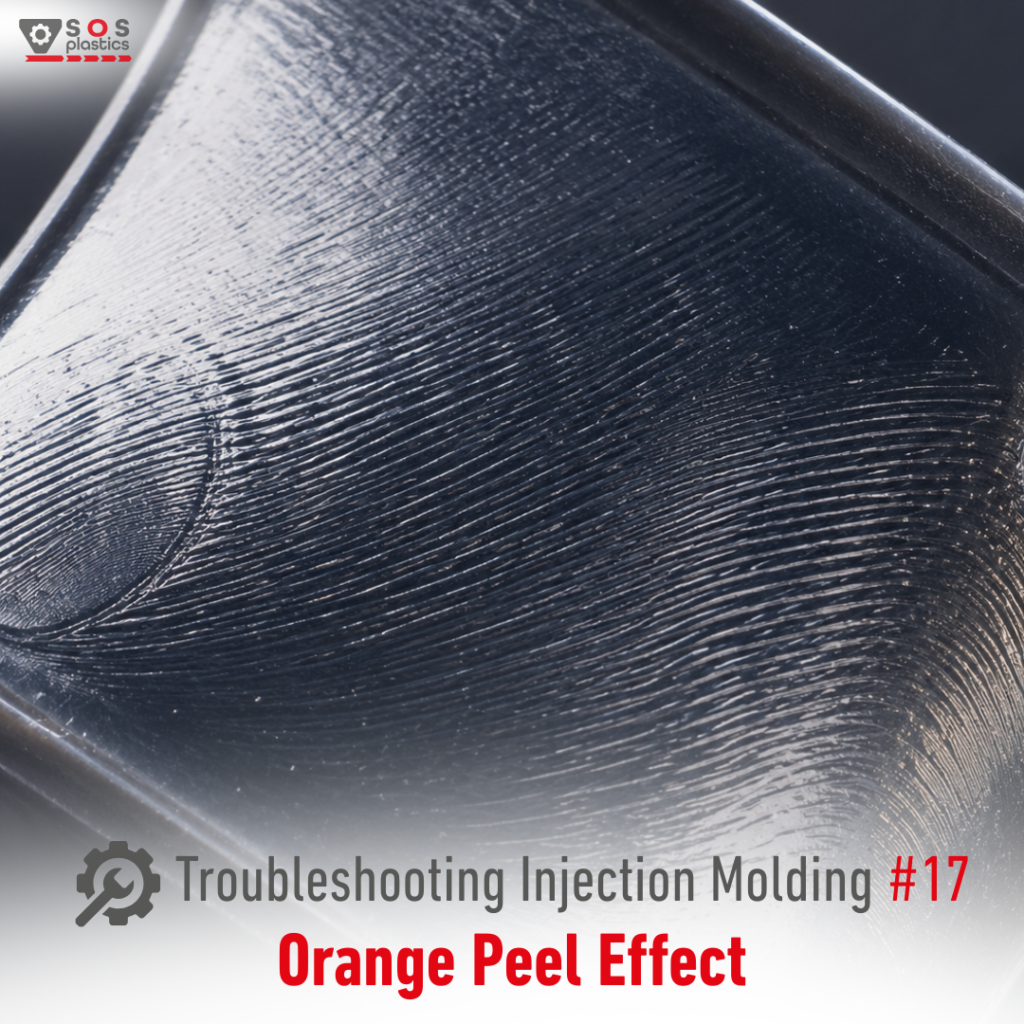
The Orange Peel Effect (or Record Grooves Effect) is a fine, uneven or rippled surface texture that resembles the skin of an orange. It is often caused when the melt cools and solidifies too quickly at the cavity wall, while the material behind the frozen surface layer is still flowing. The result is a distorted surface that can no longer properly replicate the mold surface. When troubleshooting Orange Peel, investigate the causes in the right order: 1️⃣ The melt solidifies too quickly➡️ Check the actual melt and mold temperatures. If the surface freezes too early, the polymer cannot properly replicate the cavity surface.➡️ Increase the melt temperature and/or mold temperature within the material supplier’s recommended processing window. 2️⃣ The filling speed is too low➡️ Check the injection speed, especially in the area where the defect starts.➡️ Increase the injection speed if the process is filling too slowly and the surface is freezing before proper replication takes place. 3️⃣ The melt is not pressed sufficiently against the mold wall➡️ Check injection pressure, transfer position and packing conditions. Insufficient cavity pressure can prevent the melt from maintaining proper contact with the mold surface.➡️ Optimize injection and holding pressure and verify that the cavity is adequately packed. 4️⃣ Different surface finishes on the mold halves➡️ Check both mold halves. If one surface is polished while the opposite surface is textured, matte or sandblasted, the two sides of the molded part will naturally have different surface characteristics.➡️ Make sure the surface finish is appropriate and consistent with the required part appearance. If both sides are intended to look the same, the mold finishes must also be compatible. 5️⃣ Mold surface condition➡️ Inspect the cavity for contamination, deposits, damage or an incorrect surface finish.➡️ Clean, repair or re-finish the cavity where necessary. Remember, the molded surface is largely a replication of the mold surface. ⚠️ Do not automatically blame the mold finish.If the mold surface is correct but the polymer freezes before it can properly replicate that surface, changing the polish will not solve the root cause. ⚠️ Do not simply increase injection speed without checking the whole process.Higher speed may eliminate Orange Peel, but can introduce other cosmetic defects such as gate blush, jetting or air-related problems. The objective is to find the stable process window, not simply the highest injection speed. ⚠️ Always verify the actual melt temperature.The machine setting is not necessarily the temperature of the polymer entering the cavity. Next in the Plastic Troubleshooting Series:➡️ Cold Slug What is the first parameter you check when you see an Orange Peel Effect on an injection-molded part?
🔧 Troubleshooting Injection Molding #16 – Delamination
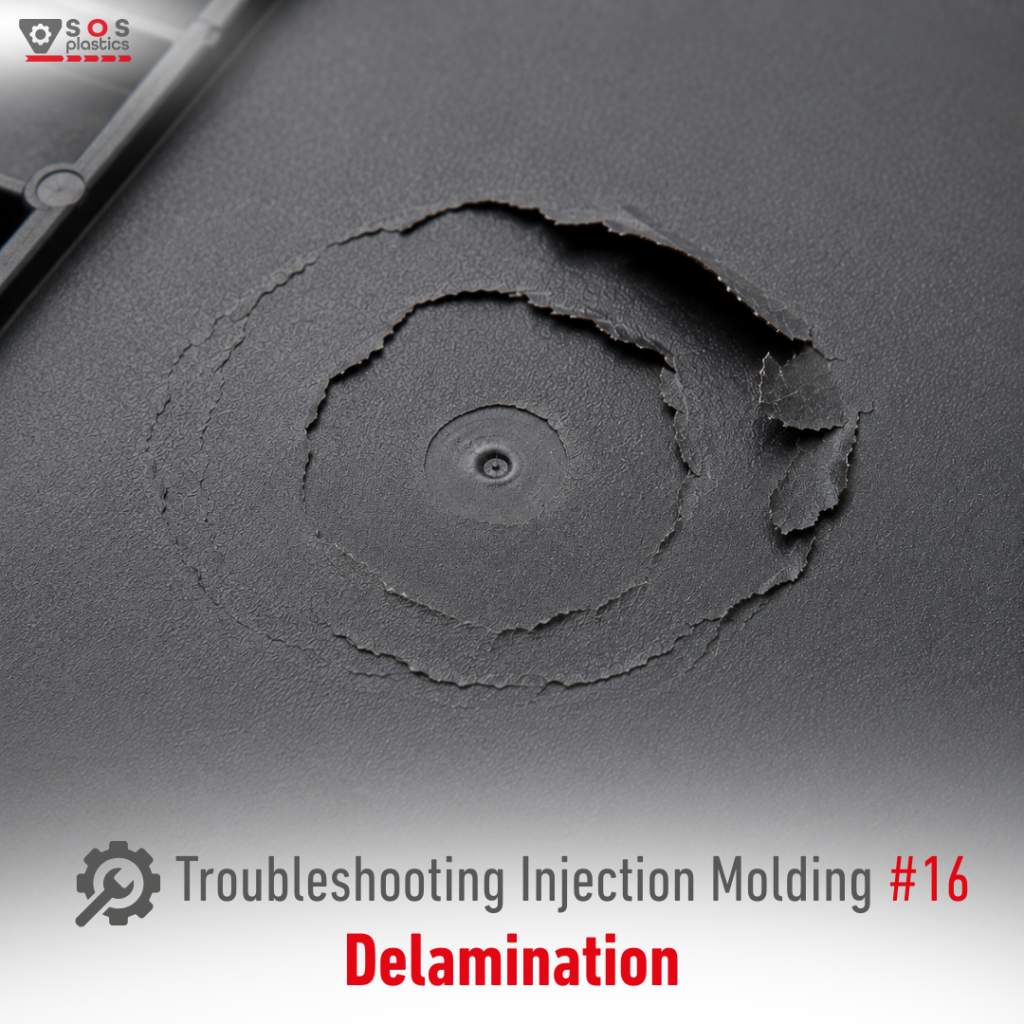
Delamination is the separation of thin layers within or near the surface of a molded part. It often looks like peeling, flaking or a thin skin that can be lifted from the surface. When troubleshooting Delamination, investigate the causes in the right order: 1️⃣ Excessive shear during filling➡️ Verify the actual melt temperature, not only the machine setpoint. If appropriate for the material, increase melt temperature and/or reduce injection speed.➡️ Check gate and runner dimensions and eliminate unnecessary flow restrictions. 2️⃣ Sharp corners or restrictive gate geometry➡️ Pay particular attention to the gate, sprue, runner transitions and sharp changes in flow direction.➡️ Reduce sharp corners and increase radii where possible.➡️ If the defect is concentrated around the gate, local shear should be one of the first suspects. 3️⃣ Material contamination or incompatibility➡️ Check for cross-contamination from another polymer, incorrect regrind, previous production material or an unsuitable color/masterbatch carrier.➡️ Verify material identity and the complete material path: grinder, dryer, conveying system, hopper, screw and hot runner.➡️ Purge and clean the plasticating unit if contamination is suspected.Even small amounts of incompatible material can create a weak interface because the different polymer phases cannot develop adequate molecular bonding. 4️⃣ Moisture and material condition➡️ For hygroscopic polymers, verify actual moisture content and dryer performance.➡️ Do not assume that the dryer setting means the material is dry enough.➡️ Check drying temperature, time, dew point and material residence in the dryer according to the resin supplier’s specification. 5️⃣ Excessive regrind or material degradation➡️ Verify the actual regrind percentage and its history.➡️ Check whether the material has been exposed to excessive residence time, melt temperature or shear.➡️ If the defect appeared after a material change or repeated recycling, isolate the source by running controlled material.➡️ If necessary, purge the machine and establish a clean baseline. ⚠️ If delamination appears mainly around the gate, investigate local shear and gate geometry first. ⚠️ If it appears over large areas or across the entire part, investigate material condition, contamination/incompatibility and the overall thermal history. ⚠️ If the material can be peeled into distinct layers, treat it as a potential material/process integrity issue, not just an appearance defect. Delamination can significantly reduce the mechanical performance of the molded part. Next in the Plastic Troubleshooting Series: ➡️ Orange Peel – Surface Texture Defect What is your first suspect when you see Delamination on an injection-molded part?
🔧 Troubleshooting Injection Molding #15 – Glass Fiber Streaks
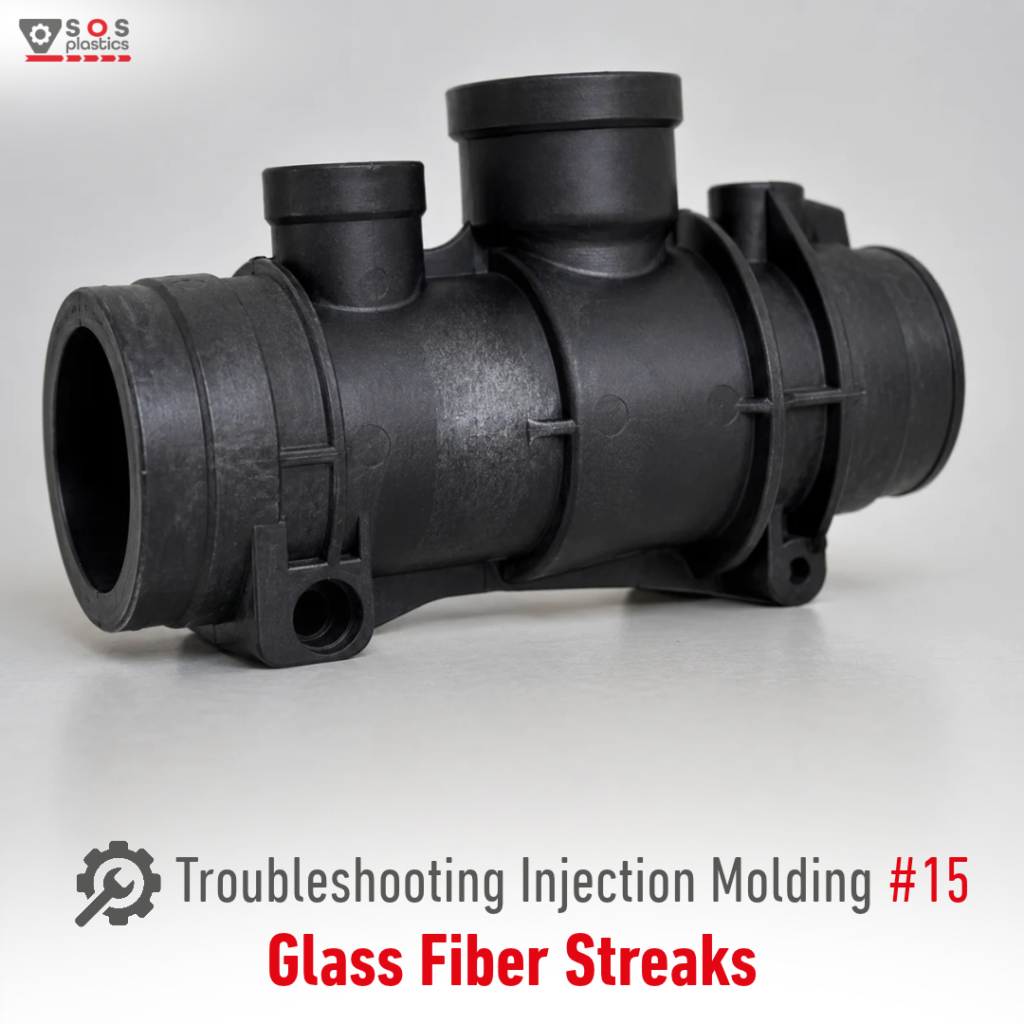
This time… a defect that can be particularly frustrating on glass-filled materials, especially when surface appearance matters. Glass fiber streaks are rough, matt, mottled or sometimes metallic-looking surface areas caused by the interaction between fiber orientation, melt flow, cooling and differential shrinkage. They are especially common around openings, ribs, thickness changes, flow diversions and weld-line areas. When troubleshooting Glass Fiber Streaks, investigate the causes in the right order: 1️⃣ The melt freezes too quickly at the mold wall➡️ If the polymer skin solidifies before the glass fibers are properly surrounded by the matrix, fibers can become visible at the surface.➡️ Check the actual melt temperature and mold-surface temperature, not only machine setpoints.➡️ Increase melt and/or mold temperature within the material supplier’s recommended processing window. 2️⃣ The filling process is too slow or poorly profiled➡️ A slow flow front gives the material more time to cool before the cavity is filled, increasing the risk of surface defects.➡️ Increase injection speed or optimize the injection profile so the melt reaches the critical areas before excessive freezing occurs. 3️⃣ Fiber orientation changes because of the part geometry➡️ Check whether the defect follows a specific geometric feature or flow pattern. If it does, the root cause may be the part or mold design, not simply the process settings. 4️⃣ Packing and shrinkage differences make the surface irregular➡️ Optimize holding pressure and holding time to improve compensation during solidification. 5️⃣ The runner or gate creates excessive shear➡️ Check gate and runner dimensions, transitions and radii. Where possible, increase the radius and/or size of the runner or gate. ⚠️ If the defect remains, look at the material itself. Shorter glass fibers can reduce the tendency for visible streaking, although this must always be balanced against the required mechanical performance. Gate relocation can also move the defect into a less visible area. ⚠️ Glass fiber streaks are often a design–material–process interaction.If the defect consistently appears at the same geometric feature, changing machine settings may only mask the problem. The real solution may be a different gate position, runner geometry, part design or material grade. ⚠️ Surface appearance and mechanical performance must be considered together. Next in the Plastic Troubleshooting Series:➡️ Delamination hashtag#SOSPlastics hashtag#InjectionMolding hashtag#PlasticTroubleshooting hashtag#GlassFiberStreaks
🔧 Troubleshooting Injection Molding #14 – Weld Lines
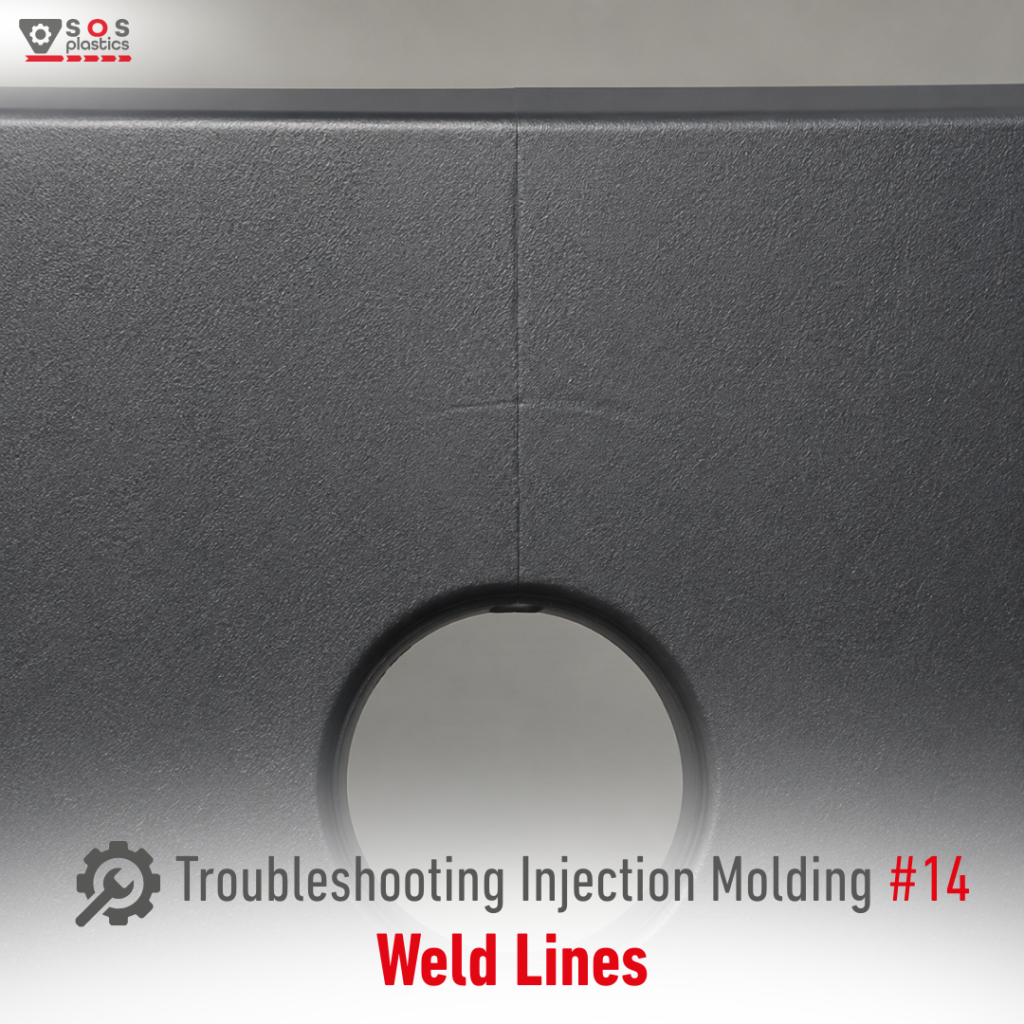
This time…interesting case, often very hard to avoid, but let me show you how to deal with it properly. A weld line (knit line) forms when two or more polymer flow fronts meet during filling. It commonly occurs around holes, cores and inserts, with multiple gates, or where the geometry causes the flow to split and reunite. Weld lines can be primarily cosmetic or become a serious mechanical weakness. When troubleshooting Weld Lines, investigate the causes in the right order: 1️⃣ The flow fronts are too cold when they meet➡️ Verify the actual melt and mold temperatures. If the fronts cool too much before meeting, molecular interdiffusion is reduced and the weld becomes weaker.➡️ Increase melt temperature and/or mold temperature within the material supplier’s recommended window. 2️⃣ The flow fronts do not merge strongly enough➡️ Check injection speed and packing conditions. A faster fill can help maintain front temperature, while sufficient pressure and hold time can improve consolidation before the area freezes.➡️ Optimize injection speed, then verify packing pressure and hold time. 3️⃣ Air cannot escape at the meeting point➡️ Weld lines often coincide with air-trap locations. Poor venting can leave air or gases between the fronts and further weaken or mark the weld line.➡️ Check and improve venting at the last-to-fill area and directly around the weld line location. 4️⃣ Material formulation makes the weld line more critical➡️ Some materials and reinforced polymers are much more sensitive to weld line strength. In glass fiber reinforced materials, fibers can become unfavorably oriented around the weld and provide less reinforcement across it.➡️ Verify the material grade and reinforcement level. If the application is highly stressed, consider a material specifically designed for improved weld line performance. 5️⃣ The mold or part design creates an unavoidable or badly positioned weld line➡️ Check gate location, number of gates, wall thickness transitions and flow around holes or cores. If the weld line cannot be eliminated, move it away from highly stressed or highly visible areas.➡️ Change the gate position, gate geometry or part thickness to alter the filling pattern and relocate the weld line. ⚠️ A weld line is not automatically a process failure.In many molded parts, weld lines are unavoidable. ⚠️ For reinforced materials, always consider the mechanical load direction. ⚠️ A weld line in a non-critical area may be acceptable. The same weld line across a highly loaded section can become the preferred crack initiation point. Next in the Plastic Troubleshooting Series:➡️ Glass Fiber Streaks
🔧 Troubleshooting Injection Molding #13 – Jetting
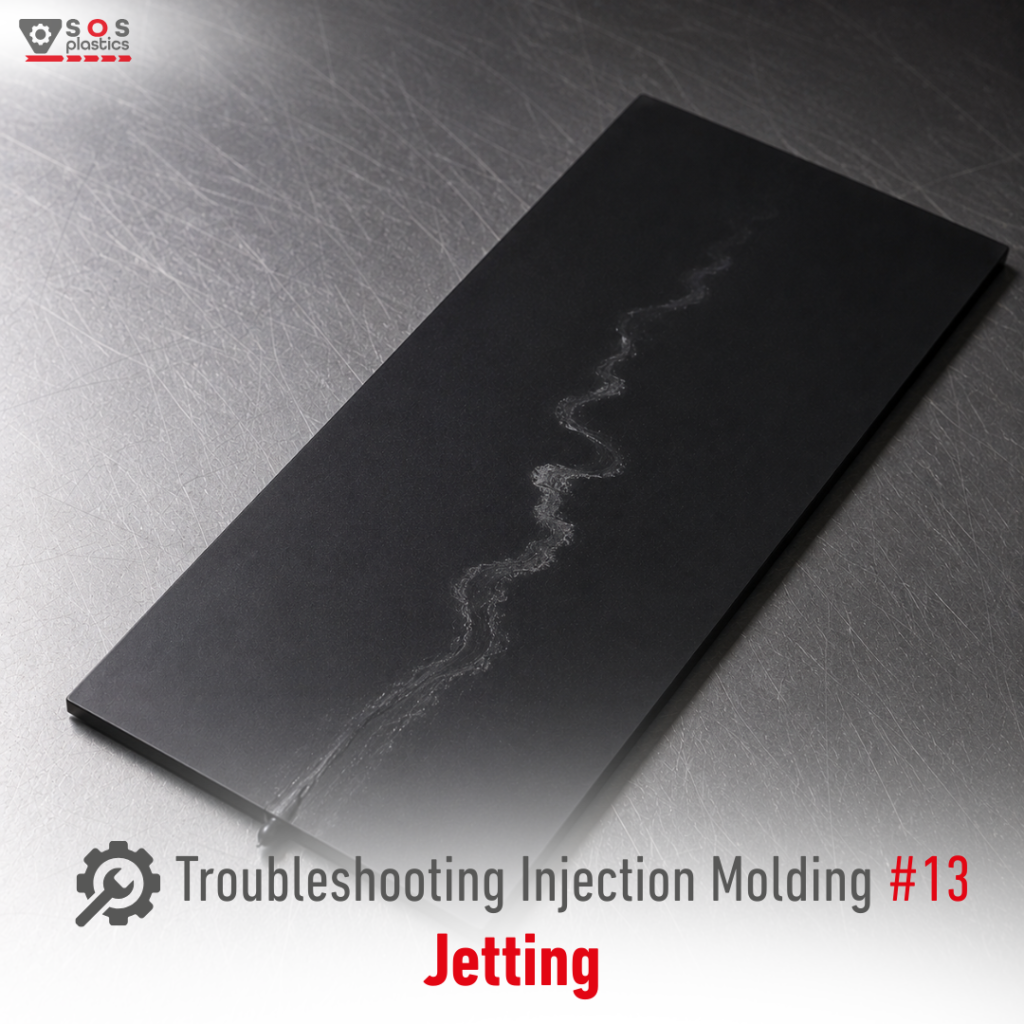
Jetting is often a mold-flow problem first and a machine setting problem second.That distinction matters. If the melt is allowed to enter the cavity as a free jet, changing process parameters may only hide the problem rather than remove its root cause. Jetting is a snake-like or rope-like flow mark, usually starting near the gate, caused by the melt entering the cavity as a free jet instead of establishing a stable flow front. When troubleshooting Jetting, investigate the causes in the right order: 1️⃣ Poor gate location or gate design, especially when the material is injecting directly into an empty space inside the mold.➜ Check whether the melt enters an open area without immediately contacting a mold wall, core or other surface. If possible, redirect the flow against steel or modify the gate design (path, size or angle) 2️⃣ Injection speed too high at the gate➜ Reduce the initial injection speed as the melt passes through the gate. Once a stable flow front is established, increase the speed again. 3️⃣ Gate or runner geometry promotes free jetting➜ Check gate size, gate angle, land length and the transition from runner to cavity. Consider a larger, fan or tab-style gate where appropriate. 4️⃣ Melt or mold temperature too low➜ Verify actual melt and mold temperatures. Increasing temperature within the material supplier’s recommended processing window may help the initial jet merge properly with the surrounding melt. 5️⃣ Material/process combination with poor flow behavior➜ Verify the actual material grade and processing conditions. Some polymers, particularly higher-viscosity materials, may be more susceptible to jetting. ⚠️ Do not simply reduce the injection speed for the entire filling stage.A better approach is often:Slow → establish stable flow → increase speed. ⚠️ If Jetting disappears when the first part of the filling profile is slowed down, this is a strong indication that the initial flow through the gate is unstable. ⚠️ If the defect starts directly at the gate and follows a characteristic snake-like path, investigate the gate and initial flow conditions before changing holding pressure or clamp force. If the gate sends the melt into an open cavity without allowing it to establish a proper flow front, process adjustments may only provide a temporary solution. Next in the Plastic Troubleshooting Series:➜ Weld Lines What is the most effective way you have found to eliminate Jetting? Do you have any photos of the defect?
🔧 Troubleshooting Injection Molding #12 – Gate Blush
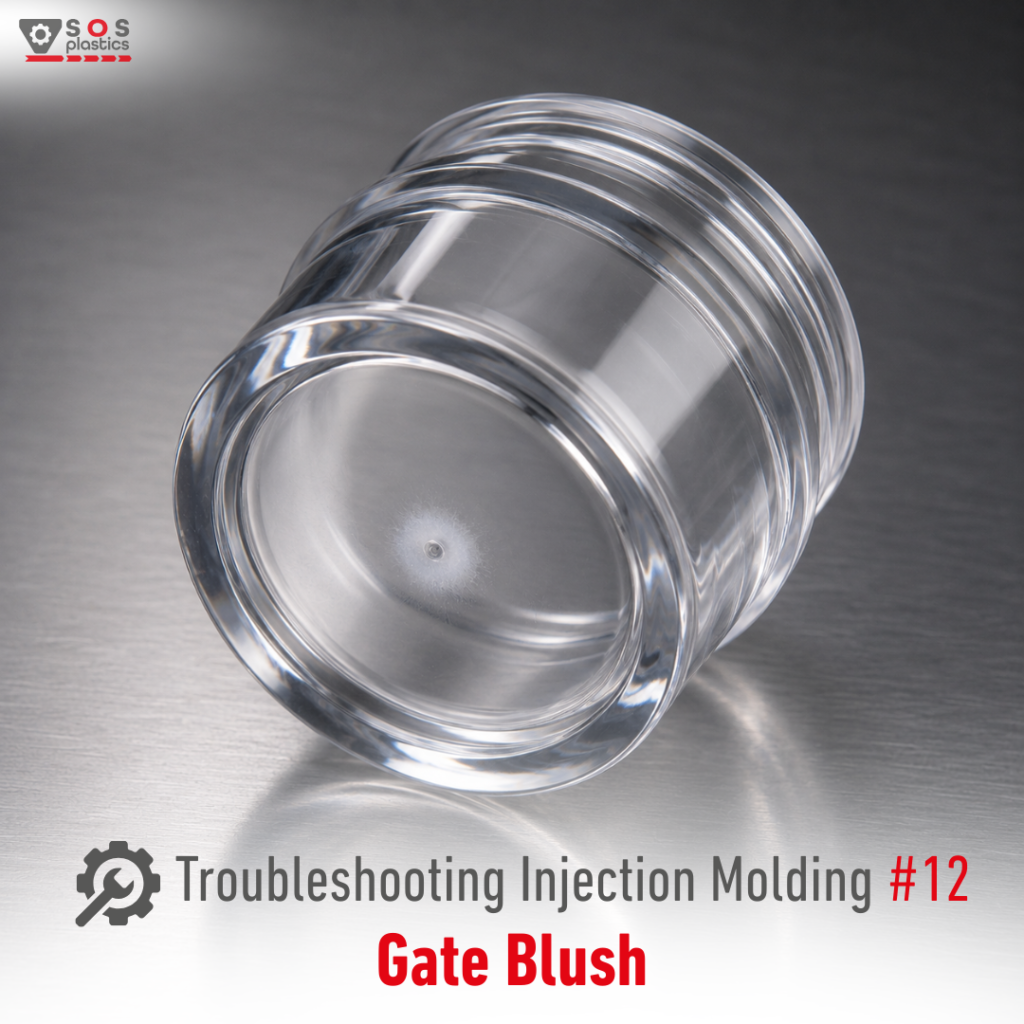
One small white mark around the gate can tell you a lot about your process.The challenge is knowing what to look for first. Gate Blush is a whitish or dull area visible around the gate, typically caused by unstable fountain flow or excessive shear during cavity filling. When troubleshooting Gate Blush, investigate the causes in the right order: 1️⃣ Excessive shear at the gate (most common root cause)➡ Verify the injection speed profile and gate dimensions. Reduce the initial filling speed or increase the gate size if possible. 2️⃣ Gate design too restrictive➡ Inspect the gate thickness, gate land length and gate type. A small or restrictive gate creates excessive shear and unstable melt flow. 3️⃣ Incorrect melt or mold temperature➡ Measure the actual melt and mold temperatures. Both excessively low and excessively high melt temperatures can contribute to Gate Blush. Optimize the process based on measured values rather than machine settings. 4️⃣ Improper filling profile➡ Avoid maximum injection speed at the beginning of filling. A slower initial filling stage often improves fountain flow and eliminates the defect. 5️⃣ Premature gate freeze or insufficient packing➡ Verify holding pressure, holding time and gate freeze time. Ensure the gate remains open long enough for proper packing. ⚠️ Gate Blush is often confused with Jetting. Jetting produces snake-like flow marks extending into the cavity, while Gate Blush remains localized around the gate. ⚠️ If reducing the initial injection speed significantly improves the defect, excessive shear at the gate is usually the root cause. ⚠️ Gate Blush is especially common on cosmetic parts where surface appearance is critical. These parts are often molded through very small pinpoint gates, making the gate area particularly susceptible to this defect. Next in the Plastic Troubleshooting Series:➡ Jetting In your experience, is Gate Blush usually solved by process optimization, or does it often require gate modification?
🔧 Troubleshooting Injection Molding #11 – Corona Effect (Gloss Transition)

Today we’ll look at one of the most misunderstood cosmetic defects in injection molding. Corona Effect (Gloss Transition) is a visible glossy or matte halo, usually around the gate, although it may also appear in other areas where the filling behavior changes. The part is dimensionally correct, but the surface appearance becomes inconsistent. When troubleshooting Corona Effect, investigate the causes in the following order: 1️⃣ Uneven filling sequence (most common root cause)➡ Verify the filling pattern using simulation if available or perform a short-shot study. Sudden changes in flow front velocity frequently create local gloss differences. 2️⃣ Injection speed profile➡ Increase, decrease or optimize the injection speed profile. A stable flow front usually produces a much more uniform surface than abrupt acceleration or deceleration. 3️⃣ Mold temperature variation➡ Measure the actual mold surface temperature. Uneven cooling or local hot/cold spots often produce visible gloss transitions. Improve cooling balance if necessary. 4️⃣ Gate too small or excessive shear at the gate➡ Inspect the gate dimensions. A gate generating excessive shear or a rapid velocity change may create the characteristic halo around the gate. Increasing the gate size often eliminates the defect. 5️⃣ Part geometry causing flow disturbances➡ Check ribs, bosses, sudden wall thickness changes and other features that locally disturb the filling sequence. Sometimes the process is correct—the geometry is the real source. ⚠️ Unlike Silver Streaks or Burn Marks, Corona Effect is primarily an appearance defect caused by differences in mold surface replication, not by material degradation. ⚠️ If the glossy ring is always centered around the gate, investigate gate design and local filling conditions before changing material settings. ⚠️ In many cases, changing only injection speed temporarily moves the defect rather than eliminating it. Always evaluate flow pattern, gate design and mold temperature together. Next in the Plastic Troubleshooting Series:➡ Gate Blush What has been the most effective solution for eliminating Corona Effect in your process?
🔧 Troubleshooting Injection Molding #10 – Matte / Shiny Surface Variations
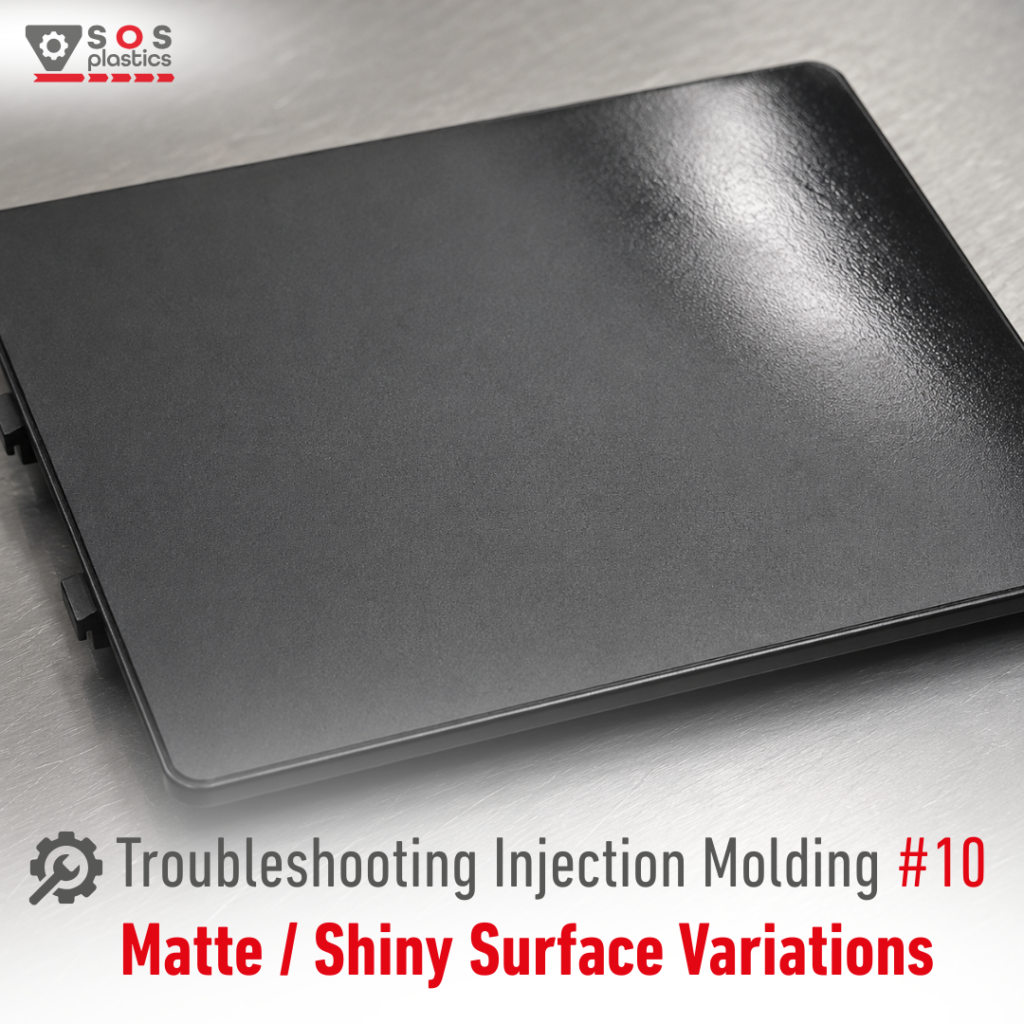
Corrective actions only work when the fundamentals are under control.Material must be properly stored and dried, processed within the recommended temperature window, and protected from degradation. Mold temperature should always be measured and verified rather than assumed. Once the fundamentals are verified, we can move on to troubleshooting. Matte / Shiny Surface Variations are unwanted differences in surface gloss where some areas appear dull while others become noticeably glossy, even though the mold surface has the same texture. When troubleshooting Matte / Shiny Surface Variations, investigate the causes in the right order: 1️⃣ Uneven cavity pressure (most common root cause)➡ Verify whether the cavity is being packed uniformly. Increase holding pressure, extend holding time or optimize the V/P transfer point. Parts that are under-packed often appear more matte because the polymer does not fully replicate the mold surface. 2️⃣ Mold temperature variations➡ Measure the actual mold surface temperature, not only the machine setting. Check for blocked cooling channels, poor water distribution or insufficient temperature control. Even small temperature differences across the cavity can create visible gloss variations. 3️⃣ Melt temperature too low➡ Increase melt temperature within the material supplier’s recommended processing window. A hotter melt reproduces mold texture more consistently and reduces local gloss differences. 4️⃣ Filling pattern or injection speed➡ Optimize injection speed and observe the flow pattern. Non-uniform filling can create areas exposed to different pressure histories, resulting in alternating matte and shiny regions. 5️⃣ Insufficient holding pressure time➡ Increase holding time until the gate freezes completely. If packing ends too early, different sections of the part solidify under different pressures, producing gloss variations. ⚠️ If the glossy area follows the flow path, the root cause is often related to filling dynamics or packing pressure. ⚠️ If the gloss difference stays in the same physical location every cycle, first suspect mold temperature imbalance or cooling issues. ⚠️ Measuring cavity pressure and actual mold surface temperature usually identifies the root cause much faster than changing processing parameters one by one. Next in the Plastic Troubleshooting Series:➡ Corona Effect (Local High Gloss Around the Gate) What has been the most common cause of surface gloss variations in your production?
🔧 Troubleshooting Injection Molding #9 – Color Streaks (Bad Dispersion)
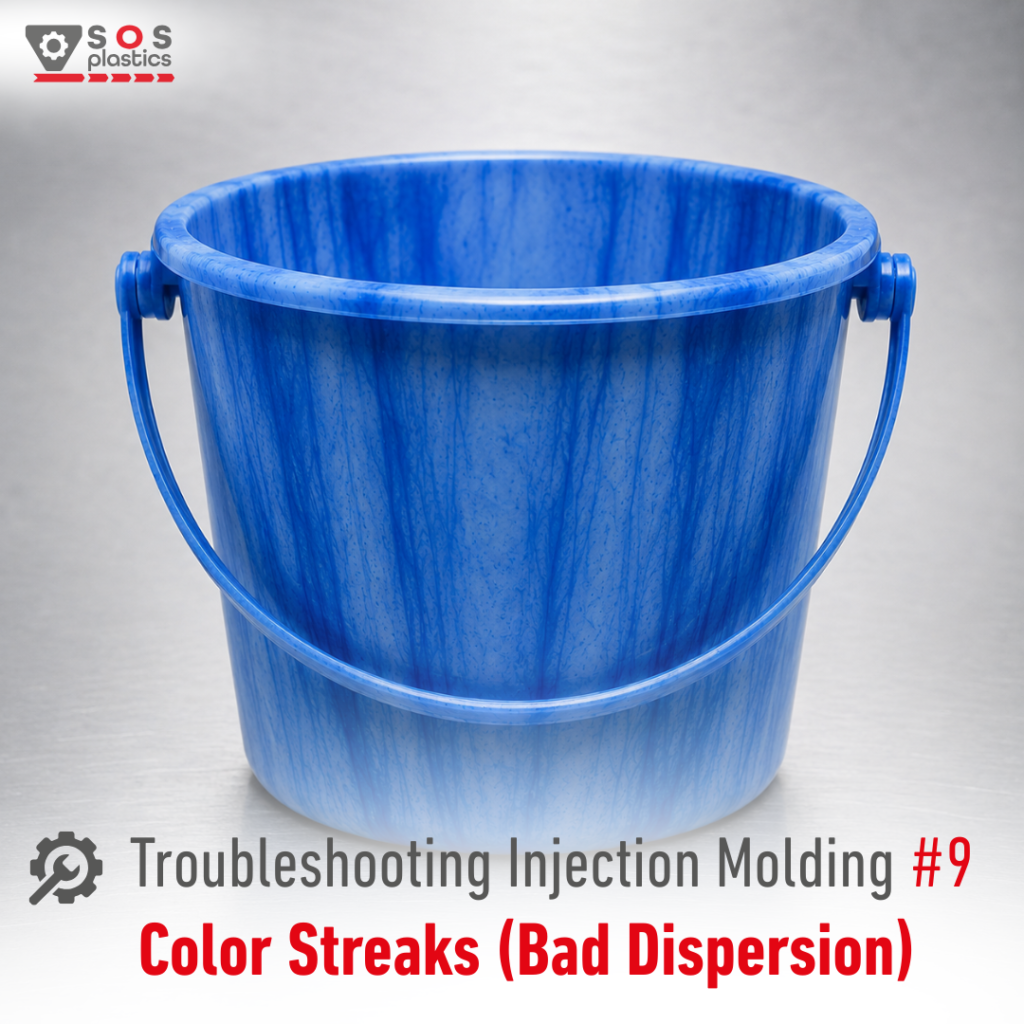
Color Streaks are often created by the plasticizing process, flow conditions, or pigment orientation rather than by the color concentrate itself. Material must be properly stored and dried (when required), processed within the recommended temperature window, and actual melt temperature should always be verified rather than assumed. Color Streaks are visible color variations, stripes or bands on the molded part caused either by poor pigment dispersion or by unfavorable pigment orientation during filling. When troubleshooting Color Streaks, investigate the causes in the following order:1️⃣ Poor pigment dispersion (most common cause)➡ Verify whether the masterbatch is mixing uniformly with the base resin. Check dosing accuracy, blender performance and material homogeneity. 2️⃣ Incorrect plasticizing conditions➡ Increase back pressure if necessary and reduce screw recovery speed to improve melt homogenization. Verify the actual melt temperature before making further adjustments. 3️⃣ Unsuitable screw mixing capability➡ If the process is stable but streaks remain, evaluate the screw design. A mixing section or mixer head may significantly improve pigment dispersion. 4️⃣ Masterbatch compatibility➡ Confirm that the masterbatch carrier is compatible with the processed polymer and that pigment concentration is appropriate for the application. 5️⃣ Unfavorable pigment orientation (especially metallic pigments)➡ If streaks follow the flow pattern or appear near weld lines, gates or flow transitions, review filling sequence, injection speed and gate location. In these cases, the pigment orientation (not dispersion) may be the root cause. 6️⃣ Thermal degradation of pigments or polymer➡ If color changes are accompanied by burning or discoloration, reduce melt temperature, residence time or excessive shear and inspect the machine for dead spots. ⚠️ Not every Color Streak is a dispersion problem. Metallic pigments often create streaks because they become oriented differently during filling rather than because they are poorly mixed. ⚠️ Before replacing the masterbatch supplier, first optimize plasticizing conditions. In many cases, increasing melt homogeneity completely eliminates the defect. ⚠️ If the defect always appears in exactly the same location, investigate mold design and flow pattern before changing material or machine settings. Next in the Plastic Troubleshooting Series:➡ Surface Gloss Variations (Matte / Shiny Areas) How do you deal with a problem of Color Streaks in your production?